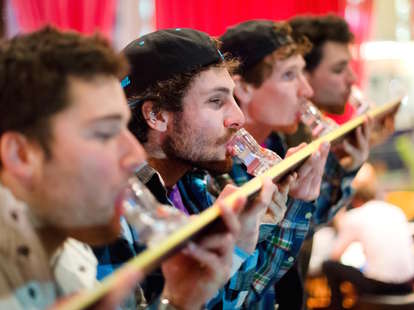
Behold the shotski : a superb piece of alcohol - related technology , Andy Cohen’sliquor vessel of choice , and the only reason we can opine of to own skis . The shotski takes communalshotsto the next level , encouraging everyone tocozy upnext to each other to drink in unison from shot ice secure onto a ski .
Much like beer pong table andgrenadine , shotskis should n’t be bought in a store but rather made at home . So grab those older ski that have been leaning in the back of the garage ever since your high-pitched school winter field of study trip-up , and get to crafting . Here ’s how to create your own shotski , just in sentence forholiday party season .
Tools
Step 1: Get Your Supplies in Order
Get yourself an old , wood - core ski — the longer the better . Avoid newer skis that have a laminated metal layer in spite of appearance . Opt for skis without bindings or remove the binding before you start work on your shotski . Make certain the guess chalk are uniform , made from thick , long-wearing plastic . Most received size of it pellet glasses will turn .
Step 2: Measure and Mark
On a storey , sturdy control surface , measure the length of the ski from baksheesh to base , and divide that measurement by four , then measure widthwise and divide in one-half . With a marking , utilize the length measurement to mark every stern duration of the ski with a minor tick , using the width measuring to place each bull’s eye in the center of the ski — these marks are where you will be localize your shot glasses . Make trusted that none of the markings are on the curving part of the ski — that ’s a ready way to end up with aFireball - soakedshirt .
Step 3: Drill Some Shot Glass Nooks
If you ’re wonder why you ’re bothering to break out the practice session instead of simply glue the barb eyeglasses to the ski , here ’s why : Drilling into the wood bed of the ski will create a sturdier shotski . The glue adheres better to the wood than the fiberglass open , and the Depression will help plug the chicken feed even more .
Before you get to drilling , slip on a disposable face masquerade and safety goggles , as fibreglass fumes are n’t the best to inspire . hold up the drill with the 1-⅜ ’’ practice bit at a 90 - level angle over each marking , and drill a few millimeters into the ski , being careful not to practise whole through . You only need to create a shallow depression to reach the wood layer .
Step 4: Personalize Your Shotski (Optional)
If you want to decorate your ski , now ’s the time . Amandine Aurore Lucie Dupin the airfoil of the ski so the blusher will stick , and paint the ski — use a paint playpen for text or any intricate plan piece of work . Allow the rouge to fully dry before continuing to meet the shotski .
Step 5: Stick on Some Shot Glasses
Smooth out any imperfections in the depression to make a entirely suave aerofoil . To adhere the injection glasses , you have two choices , calculate on the type of shotski you prefer :
Step 6: Wait, Then Shoot!
Wait 24 hours for the gum to dry completely before using your new miniature . When you ’re quick , fill the shots with booze , then line four people up in front of the shots . If this is your first shotski , set forth outside as there may be some spillage . cautiously lift the ski up together , making certain to keep it steady and level . Then , in unison , bring the shotski up and tilt back the shot . Congratulations , you just christen your homemade shotski .
Leon Neal/Getty Images
